How-To Tips, Photography and Printing
How-To Tips: Calibrating Your Mac Monitor for Photo Printing without a Calibration Device
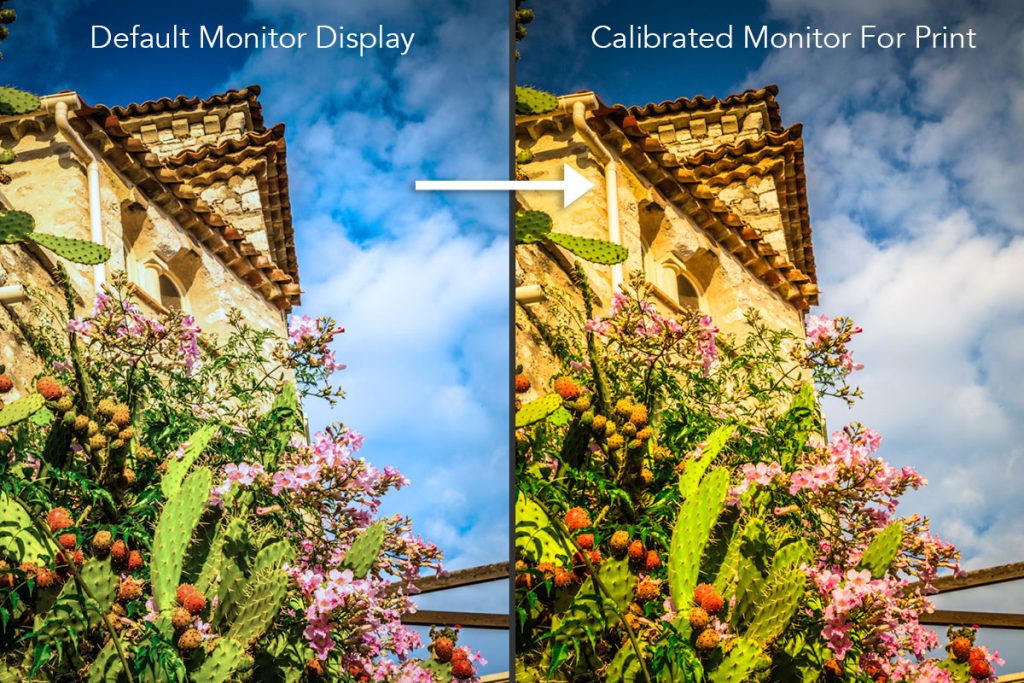
If you’re a serious photographer, you probably have an understanding of monitor calibration and its importance. Monitors need to be calibrated so that the colors you see on your screen accurately represent what will come out of your printer. While monitor calibrators are an essential tool for photo editing and printing, they can be quite expensive and tricky to set up. Over the years, we’ve noticed that many photographers choose not to bother with calibration, which can lead to inconsistent results when printing or displaying their work. If you plan to print your photos or want to ensure that your pictures look consistent on other monitors, it’s important to take a few steps. The good news is that calibrating your Mac monitor is easier than you might think, and your system settings can work just as accurately as monitor calibrators such as Spyder or X-Rite ColorMunki. All you need to do is follow these steps:
Step 1: Prepare your monitor for calibration
Before you begin the calibration process, you should make sure your monitor is set up correctly. This includes:
- Placing your monitor in a well-lit area, away from direct sunlight or other bright light sources.
- Making sure your monitor is clean and free from dust and fingerprints.
- Setting your monitor’s brightness to 50%.
Step 2: Open System Preferences
Click on the Apple icon in the top left corner of your screen and select “System Preferences.”
Step 3: Select “Displays”
In the System Preferences menu, select “Displays.”
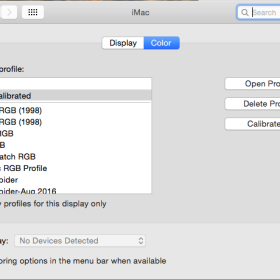
Step 4: Click on “Color”
In the Displays menu, click on the “Color” tab.
Step 5: Select “Calibrate”
Under the “Color” tab, click on the “Calibrate” button.
Step 6: Follow the on-screen instructions
The Display Calibrator Assistant will open and guide you through the calibration process. Follow the on-screen instructions carefully to calibrate your monitor.
Step 7: Choose a gamma setting
During the calibration process, you’ll be asked to choose a gamma setting. For photo printing, it’s recommended to choose a gamma setting of 1.8, which is the standard for graphic arts work.
Step 8: Choose a target white point
Next, you’ll be asked to choose a target white point. Select “D50” or “5000K” for a warm yellowish white, which is the standard for graphic arts work.
Step 9: Adjust brightness and contrast
After you’ve chosen your gamma setting and white point, the calibration tool will guide you through adjusting your monitor’s brightness and contrast. Adjust these settings until the image on your screen matches the reference image provided, and make sure it’s not too bright.
Step 10: Save the calibration profile
Once you’ve completed the calibration process, the Display Calibrator Assistant will ask you to save the calibration profile. Save it with a descriptive name, such as “Photo Printing,” so you can easily select it in the future.
Step 11: Apply the calibration profile
To apply the calibration profile, go back to the “Color” tab in the Displays menu and select the profile you just created from the “Display Profile” dropdown menu. Your monitor is now calibrated for photo printing.


Already an expert in color editing?
Take the first step towards achieving optimal color accuracy for your photo printing needs. Order your custom prints now using our online price calculator and experience the difference of calibrated color accuracy.

Need help with your print order or image editing?
Schedule a consultation session with our experts for personalized assistance. With our hourly rate of $180, you’ll receive 15 minutes for free. Let us help you bring your vision to life and achieve optimal color representation for your photo printing needs.